
 Start page
 PC modifications mainpage
 Homemade watercooling ZERO FAN system
MORE INFO AND PICTURES WILL FOLLOW SOON... THIS PAGE IS NOT COMPLETE YET !!
While working with my first approch to watercooling using a car radiator, to cool down the water,
I learned that it only works if a FAN presses air trough it, else it will not work.
Since my goal was not to make a low noise systen, BUT a total noise free system,
I desided not to use the car radiator, but a homemade radiator made of copper tubes soldered on a huge copper plate.
it will be about the size of my PC, so it can be mounted on the right side of my PC. That side is newer opened.
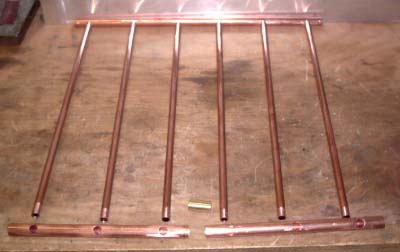
My radiator is made using 6 pcs 50 cm long 12 mm tubes. and one 50 cm long 18 mm tube, and two 25 cm long 18 mm tubes,
I got all the tubes from my local "Silvan" it is not expensive. (55dkr/m and 80dkr/m)
the 12 mm OD tube has 10 mm ID, the 18 mm OD tube has 16 mm ID (OD = Outer Diameter, ID = Inner Diameter)
Just before soldering..
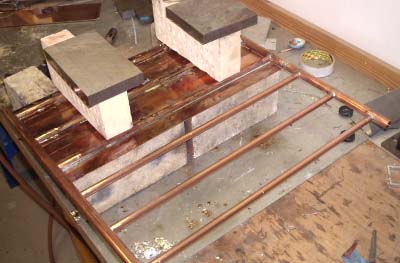
The soldering setup needs to be good stable and safe..
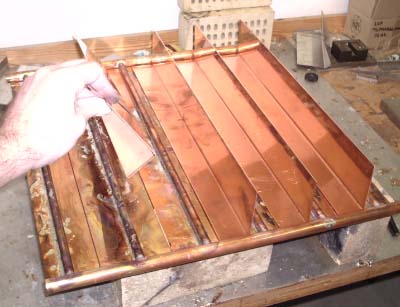
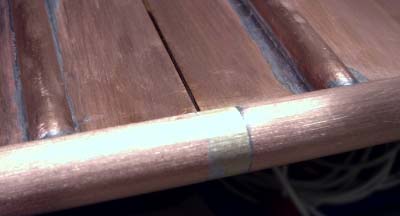
The copper plate needed to be cut into 6 small pieces, I tried to solder the two first tubes
onto one big copper plate, it was a terrible mess !!! due to heat extraction. After cutting the plate, it was easy to heat it up and soldering.
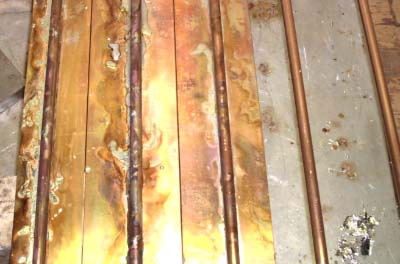
The two first tubes to the left on this picture was my first try, looks really bad just after soldering. but after cleening it will be fine.
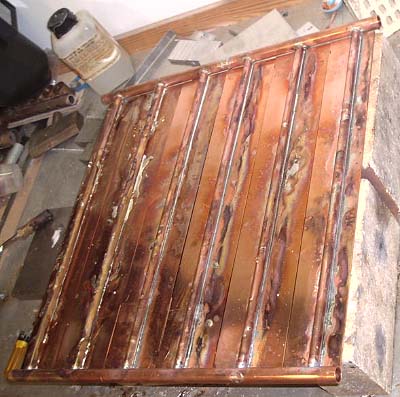
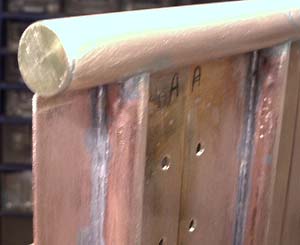
Now all tubes and plates was soldered, See how the last few tubes (most right) looks much better.
After a some experiments and a few hours soldering I learned the trick to solder with a gas burner
First I tried to make some of the extra cooling plates in copper, but it was too heawy so I disided to go for aluminium.
When this radiator is complete assembled with all 10 cooling plates,
the outside surface area will be 12980cm2 that is 1.3 square meter cooling surface, now I dont need a FAN
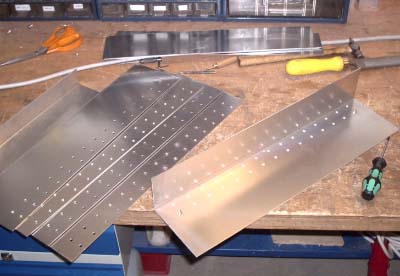
Here are my alu plates, I learned that drilling BEFORE bending is much more easy !! I drilled 5 at a time to save time
Here is my water tapping valve, and water output hose connection to pump, mounted bottom right side of radiator pic24. - pic30
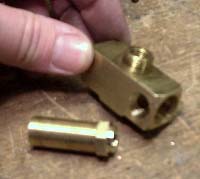
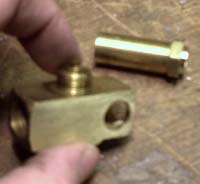
The valve is made in brass so I drilles a hole and soldered the output connection to it. PIC13 - PIC14 out of focus sorry..
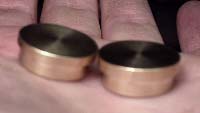
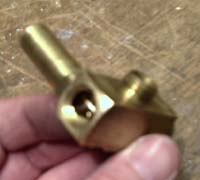
The two end stoppers for the long top tube, also hand made in brass.
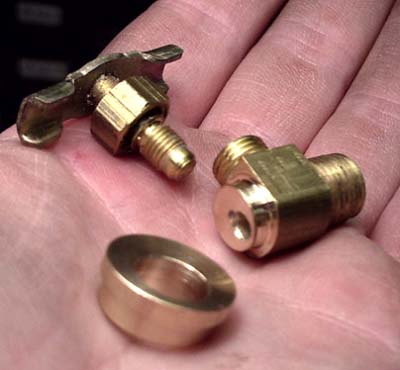
This little valve was adjusted a bit using a turning lathe, so that it can fit into the right top endstopper.
It is easy to open this valve to let air out of the system.
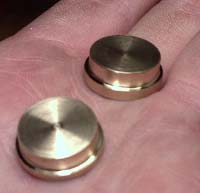
Close up of this homemade brass fitting, it is solderd in the middle of the input and output tubes (bottom)
Top left stop, I think the homemade and inside mounted types looks much better compared to standard types.
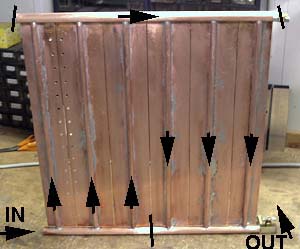
Here is the water flow path drawn in with black arrows, the end stop and center stop is also marked.

Here is my 40/30mm plexiglass tube, it is 60cm long, I just could not resist to play with a blue LED
This tube will be mounted in the very front of the radiator, the warm water from the PSU will enter
this tube first, then flow into the radiator... See plexiglass tube
Thermal Properties of Aluminum and Copper
Property                              Aluminum         Copper            Water
Thermal Conductivity  @ 0 - 100°C     237 W m-1 K-1    401 W m-1 K-1
Specific Heat @ 25°C                  900 J K-1 kg-1   385 J K-1 kg-1    4190
Linear Expansion Coefficient @0-100°C 23.5 x10⁻⁶ K-1   17.0 x10⁻⁶ K-1
Density g / cm3                       2.70             8.92              1.0
Free counters at counter.digits.com